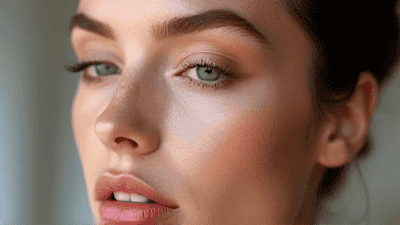
Contouring has become a cornerstone technique in the beauty world, celebrated for its ability to enhance natural features and create an illusion of depth and structure. From the red carpet to everyday makeup routines, contouring allows individuals to sculpt their faces for a defined and polished look. However, mastering the art of contouring can seem daunting, especially with the plethora of products and techniques available. This comprehensive guide aims to demystify contouring, providing you with essential tips and techniques to enhance your features with confidence and finesse.
At its core, contouring involves the use of makeup to alter the perception of the natural structure of the face. By strategically applying lighter and darker shades of makeup, you can create dimension, highlight desired features, and minimize areas you may want to draw less attention to. This technique relies on the principles of light and shadow—highlighting areas where light naturally hits and shading areas to create the illusion of depth.
Contouring is grounded in the principles of light and contouring. Lighter shades reflect light and bring features forward, while darker shades absorb light, creating shadows that recede. Understanding this concept is key to effectively sculpting your features.
Before diving into techniques, it is essential to understand the various products available for contouring. Each product has its unique application method and finish, allowing you to choose what works best for your skin type and desired look.
Cream contour products are thick and pigmented, making them ideal for creating a strong definition. They work exceptionally well on dry or mature skin, as the creamy texture can blend seamlessly and provide a dewy finish. Cream contours come in compacts, sticks, or palettes, offering versatility depending on your preferences.
Liquid contours are lightweight and easy to blend. They can be an excellent choice for individuals with normal to oily skin, as they provide an airbrushed finish. Liquid contour products can be used alongside foundation for seamless blending or applied directly to the skin.
Powder contour products are often found in compacts or palettes. They are ideal for setting makeup and building a more natural finish. Powder contours are suitable for all skin types, especially oily skin, as they can help absorb excess oil and provide a matte finish.
Contour palettes typically include a range of shades for contouring, highlighting, and sometimes bronzing. These palettes provide a comprehensive solution for sculpting the face and often include complementary shades to match different skin tones.
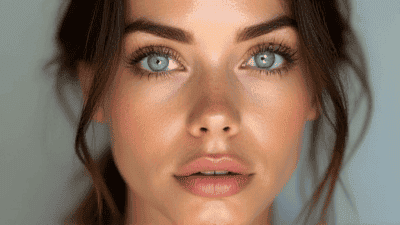
Highlighters are essential in contouring as they emphasize the areas of the face that should catch the light. Highlighters come in various forms, including liquids, creams, and powders, making it easy to find a product that fits your skin type and desired glow.
Selecting the right shades for contouring is crucial for achieving a natural look. Here’s a simple guide to help you choose:
For those with cool undertones (pink or blue hues), opt for cooler shades of contour that are taupe or ash-based. Highlighters should have a cooler, more silvery tone.
Individuals with warm undertones (yellow, peach, or golden hues) should look for warmer contours in shades of caramel or bronzer. Highlighters that are golden or peachy complement warm undertones nicely.
If you have neutral undertones, you have the flexibility to choose either warm or cool tones. Experiment with various shades to see what enhances your natural complexion.
Testing different shades on the jawline or wrist helps determine which colors work best with your skin tone. Always consider the undertone of the product in relation to your skin to ensure a seamless blend.
Before applying any contouring products, it is essential to prepare your skin properly. Here’s how to get your face ready for makeup application:
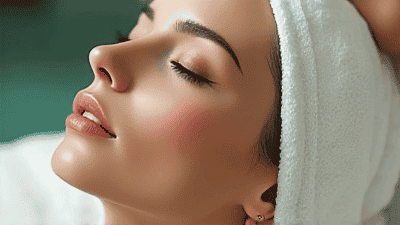
Start with a clean face to remove impurities and excess oils. Use a gentle cleanser suitable for your skin type to prep your canvas.
Regular exfoliation removes dead skin cells, creating a smoother surface for makeup application. This step is crucial for achieving a flawless finish.
Applying a moisturizer will keep your skin hydrated and improve the texture of the surface area where you'll apply contour. Choose a lightweight, non-greasy moisturizer for the best results.
Using a makeup primer helps to create a smooth base and prolongs the wear of your makeup. Depending on your skin type, choose a mattifying primer for oily skin or a hydrating primer for dry skin.
Now that your skin is prepared, it's time to learn the fundamental techniques of contouring. Here are some essential steps to help you create beautifully sculpted features:
Before applying contour, it’s crucial to understand your face shape, as this will dictate where to place your contour and highlight for optimal enhancement:
Oval: An oval face shape has balanced proportions. Light contour on the sides of the forehead and jawline enhances softness.
Round: For round faces, focus on contouring the sides of the cheeks and jawline to create the illusion of length.
Square: Contour along the jawline and forehead corners to soften angular features.
Heart: Lightly contour the sides of the forehead and chin to create balance.
Long: Contour the sides of the forehead and beneath the chin to shorten the appearance of the face.
Use a cream or liquid contour to mark the areas you want to define:
Forehead: Apply a contour shade along the hairline to create the illusion of a smaller forehead.
Cheekbones: Make a diagonal line under your cheekbone from your ear to the corner of your mouth, stopping halfway.
Nose: For a slender nose appearance, apply contour along the sides of the nose, blending well to avoid harsh lines.
Jawline: Use contour along the jawline to create definition and a more sculpted look.
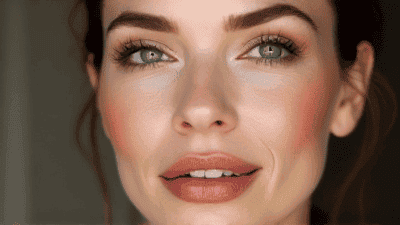
Highlight the areas where light naturally falls on your face to enhance your features:
Top of the Cheekbones: Apply highlighter on the tops of your cheekbones to make them pop.
Bridge of the Nose: Adding highlighter on the bridge creates the illusion of a straighter nose.
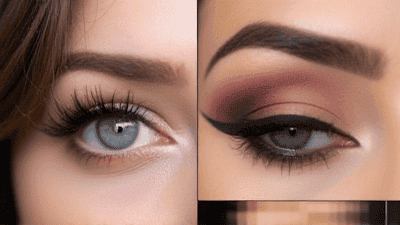
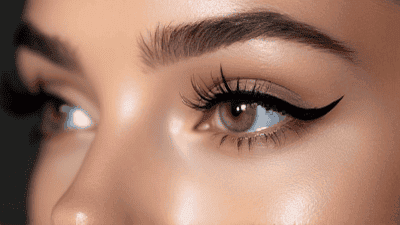
Brow Bone: Highlight just under the brow arch to lift the eyebrows.
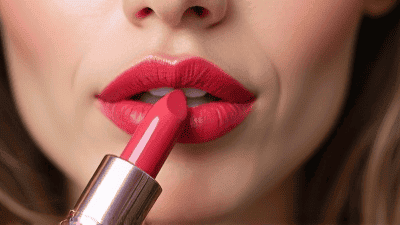
CUPID'S BOW: Apply highlighter on your cupid’s bow to enhance the fullness of your lips.
Forehead and Chin: A light highlight on the center of the forehead and chin can bring the face together.
Understanding how to apply contour and highlighter is crucial for achieving a natural finish. Here are some techniques to help perfect your application:
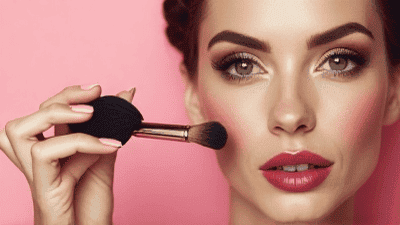
Invest in quality brushes, sponges, or tools for the best application.
Contouring Brush: Use an angled brush for precise application of cream or liquid contour.
Blending Brush: A fluffy brush is ideal for blending out contour powder.
Beauty Sponge: A damp beauty sponge is excellent for seamless blending of cream or liquid products.
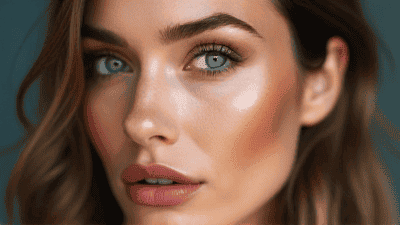
Contour: Start from the hairline and work down toward your natural cheekbone in short strokes, blending downward to prevent harsh lines.
Highlight: Use your fingertip or a brush to apply highlighter, starting at the high point of your cheekbone and tapping it in place.
The key to natural-looking contouring lies in blending. Always blend your products well to eliminate harsh lines:
Use a clean brush or sponge to soften edges between the highlighted and contoured areas.
If needed, go back over with a clean foundation brush to blend out any areas.
Start with a small amount of product and build up as desired. It’s easier to add more product than to take away excess.
After completing your contouring routine, set your makeup with a translucent powder. This will help prolong the wear and maintain a polished appearance throughout the day.
Once you’ve mastered the basics, you may want to explore advanced contouring techniques that can take your look to the next level.
For a more dramatic look, consider applying cream contour first and then setting it with a powder contour. This combination allows for enhanced longevity and definition.
This technique involves highlighting the areas of the face where you would typically apply contour. Use a light foundation shade on the jawline, under the eyes, and on the forehead. It creates contrast and enhances the face’s structure.
Incorporating bronzer into your contouring routine adds warmth to your look:
Use bronzer on the areas where you naturally tan, such as the temples, cheeks, and nose.
Apply bronzer after your contour for a sun-kissed glow that softens the look.
For those with redness or discoloration, consider color-correcting before contouring. Green correctors can neutralize redness, while peach tones can help correct dark circles.
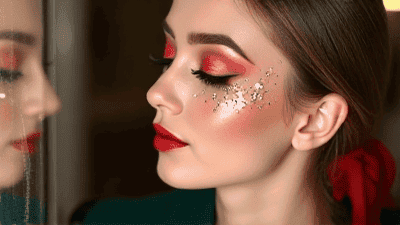
Experiment with shimmer highlighters for a dewy look. White or cream-based highlighters can intensify your features and add a radiant glow.
It’s natural to make mistakes when learning to contour. Here are some common errors and how to remedy them.
Understanding how to adjust your contouring for various occasions can also improve your makeup game. Here’s how to tailor your contouring for different events:
For a natural look, opt for lighter contour products that enhance rather than dramatically alter your features. Focus on subtle highlighting for everyday confidence.
In the evening or for events, feel free to go a bit bolder. Start with a stronger contour and use a more pronounced highlighter to give your makeup longevity under dim lighting.
For special occasions, professional makeup artists often use contouring for stunning looks. Depending on the theme, ensure your face is well-defined yet still beautiful. Consider airbrush makeup for long-lasting results.
If you're getting photographed, enhance your contour and highlight for added definition. Use matte products to avoid flashback and oiliness.
At the end of your day or event, it’s crucial to remove your makeup properly. Here’s a step-by-step guide to ensuring your skin stays healthy:
Choose a makeup remover that targets long-wear formulations. Micellar water or cleansing oils work well for thorough removal.
Follow up your makeup remover with your regular skincare cleansing routine to ensure all residue is cleared away.
End with a good moisturizer. Contouring products can sometimes dry out the wearer's skin, so hydration is essential for keeping your skin healthy and nourished.
The art of contouring is a powerful technique that can transform your makeup routine and enhance your natural beauty. With the right products, techniques, and a bit of practice, you can sculpt your features with skill and confidence.
Whether you’re going for a subtle enhancement for daily wear or a bold look for special occasions, contouring provides endless possibilities for customization. Remember that practice is key to mastering this art; don’t be afraid to experiment with different products and techniques to find what works best for you.
Contouring is about enhancing the features you love and gaining confidence in your appearance. Embrace your journey and have fun discovering all the styles and techniques that make you feel your best.